Overview
Cerrax Cloud is a suite of tools I created for myself and my family to coordinate and manage our everyday tasks and data.
Cerrax Cloud currently has 3 apps:
| App Name | Description |
|---|---|
| Admin | Manage the users and permission of Cerrax Cloud. |
| Lister | Create checklists and share them with other Cerrax Cloud users. |
| Docket | Create items with dates and history for tracking long-running goals and tasks. |
More apps planned for the future!
Basic Concepts
Cerrax Cloud was designed with mobile use in mind. As such, viewing it on a desktop browser is a bit underwhelming, but the usage is exactly the same as on a mobile device.
Navigation
The very top of the window is the name of the current page and some navigation options. On the left side, there is a Back button, which simply moves you back one page. On the right side, the Menu hamburger icon will take you back to the Cerrax Cloud main menu.
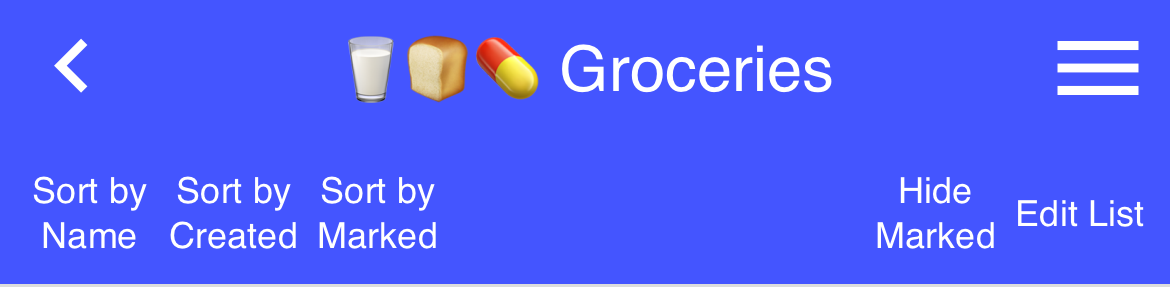
Action Bar
Just below the navigation is the Action Bar. Depending on the app you are in, this bar will change to show various options available.
For example: when viewing a list in the Lister app, the Action Bar has the following options:
- Sort by Name
- Sort by Created
- Sort by Marked
- Show/Hide Marked
- Edit List (if available)
View actions or other very common actions are presented on the right side of the Action Bar. Less common or unrelated actions appear on the right side. In this example, sorting is on the left, and the right has additional actions for filtering out marked items, and editing the list itself.
Admin
The Admin app is where you can create, edit, and delete users of the Cerrax Cloud, as well as grant or revoke permissions for each app (including Admin it self).
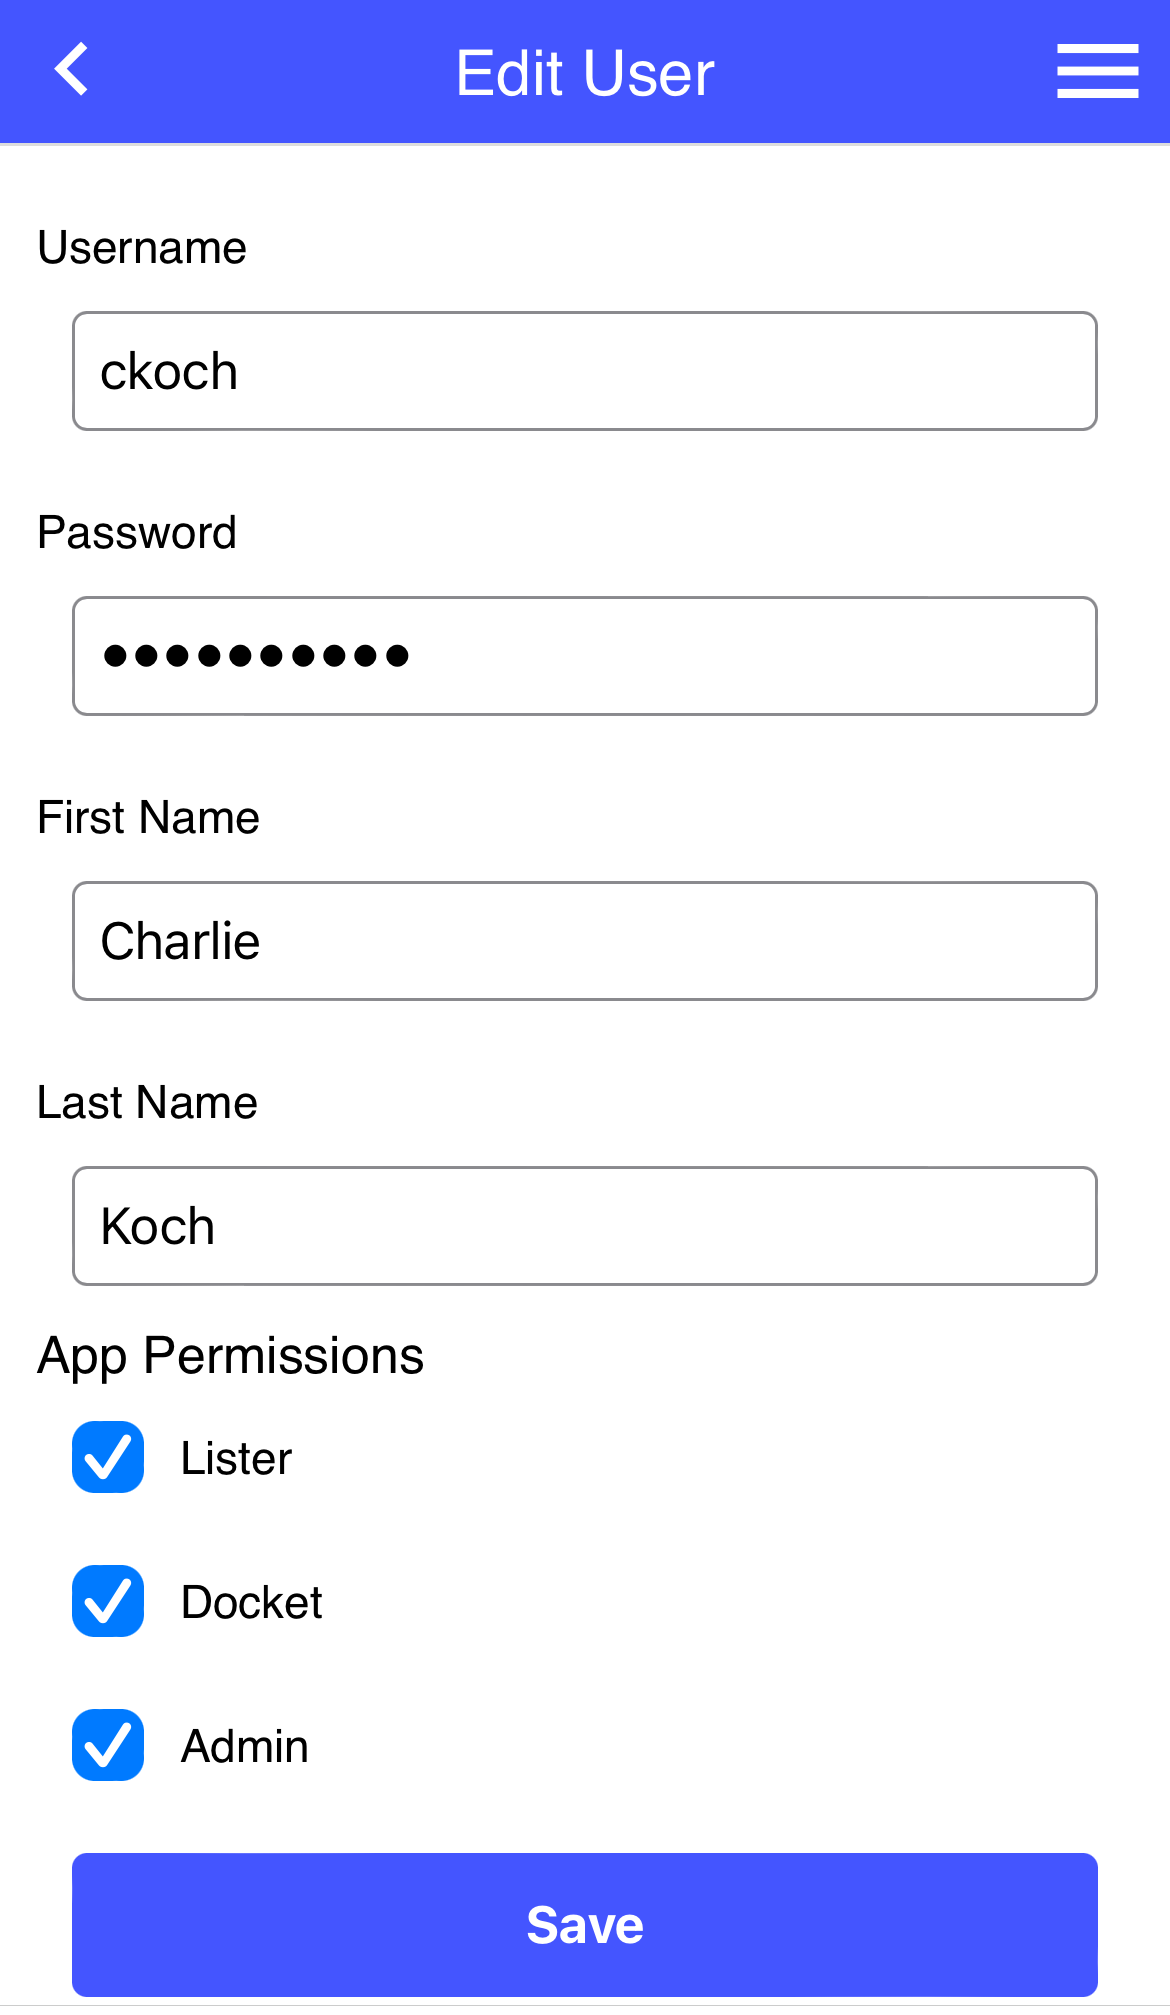
Managing Users
A user in Cerrax Cloud has a unique username and requires a password with at least 8 characters of both letters and numbers. Users are also required to have a First and Last Name, in order to display them in the user interface.
| NOTE: | Deleting a user will also delete all of the data owned by them. If they are sharing data with other users (such as sharing a list in the Lister app), those users will no longer see or be able to access that data, as it will be deleted. |
To preserve shared data, you can effectively disable a user by revoking permissions to all apps (see below). The user will still be able to log in, but the only option they will see in the Cerrax Cloud navigation will be the Logout button.
Permissions
A user can be granted access to any app by checking the box next to that app's name. Unchecking a box will deny access to that app.
| NOTE: | If a user loses access to an app they previously had permission for, they will not be able to access any of the data associated with that app. You must restore access to the app via the Admin screen for them to see and interact with that data. |
Lister
A simple checklist app. No notes. Literally.
Lister focuses on simplicity, with a clean iterface and only a few options to sort and view lists. The goal is to provide the functionality most wanted from a checklist app, without any clunky, unnecessary add-ons getting in the way.
Settings
To access settings, on the main Lister menu, click on "Settings" on the right side of the Action Bar.
| Setting | Description |
|---|---|
| Delete marked items | Choose a timeframe to delete marked items from a list. |
| Automatically delete empty lists | If this is checked, lists are automatically deleted when all items have been checked. |
| NOTE: | These settings affect every list in your Lister app. For example: if you have Automatically delete empty lists checked, then any time a list has all items deleted (either manually, or due to being checked) the list will also automatically be deleted. |
Create a List
Click on "+ New List" in the right side of the Action Bar to start a new checklist. You will need to provide a name an at least 1 item to begin the list. The app gives you only slots for 10 items during ceration, but you can add more items after the list has been created.
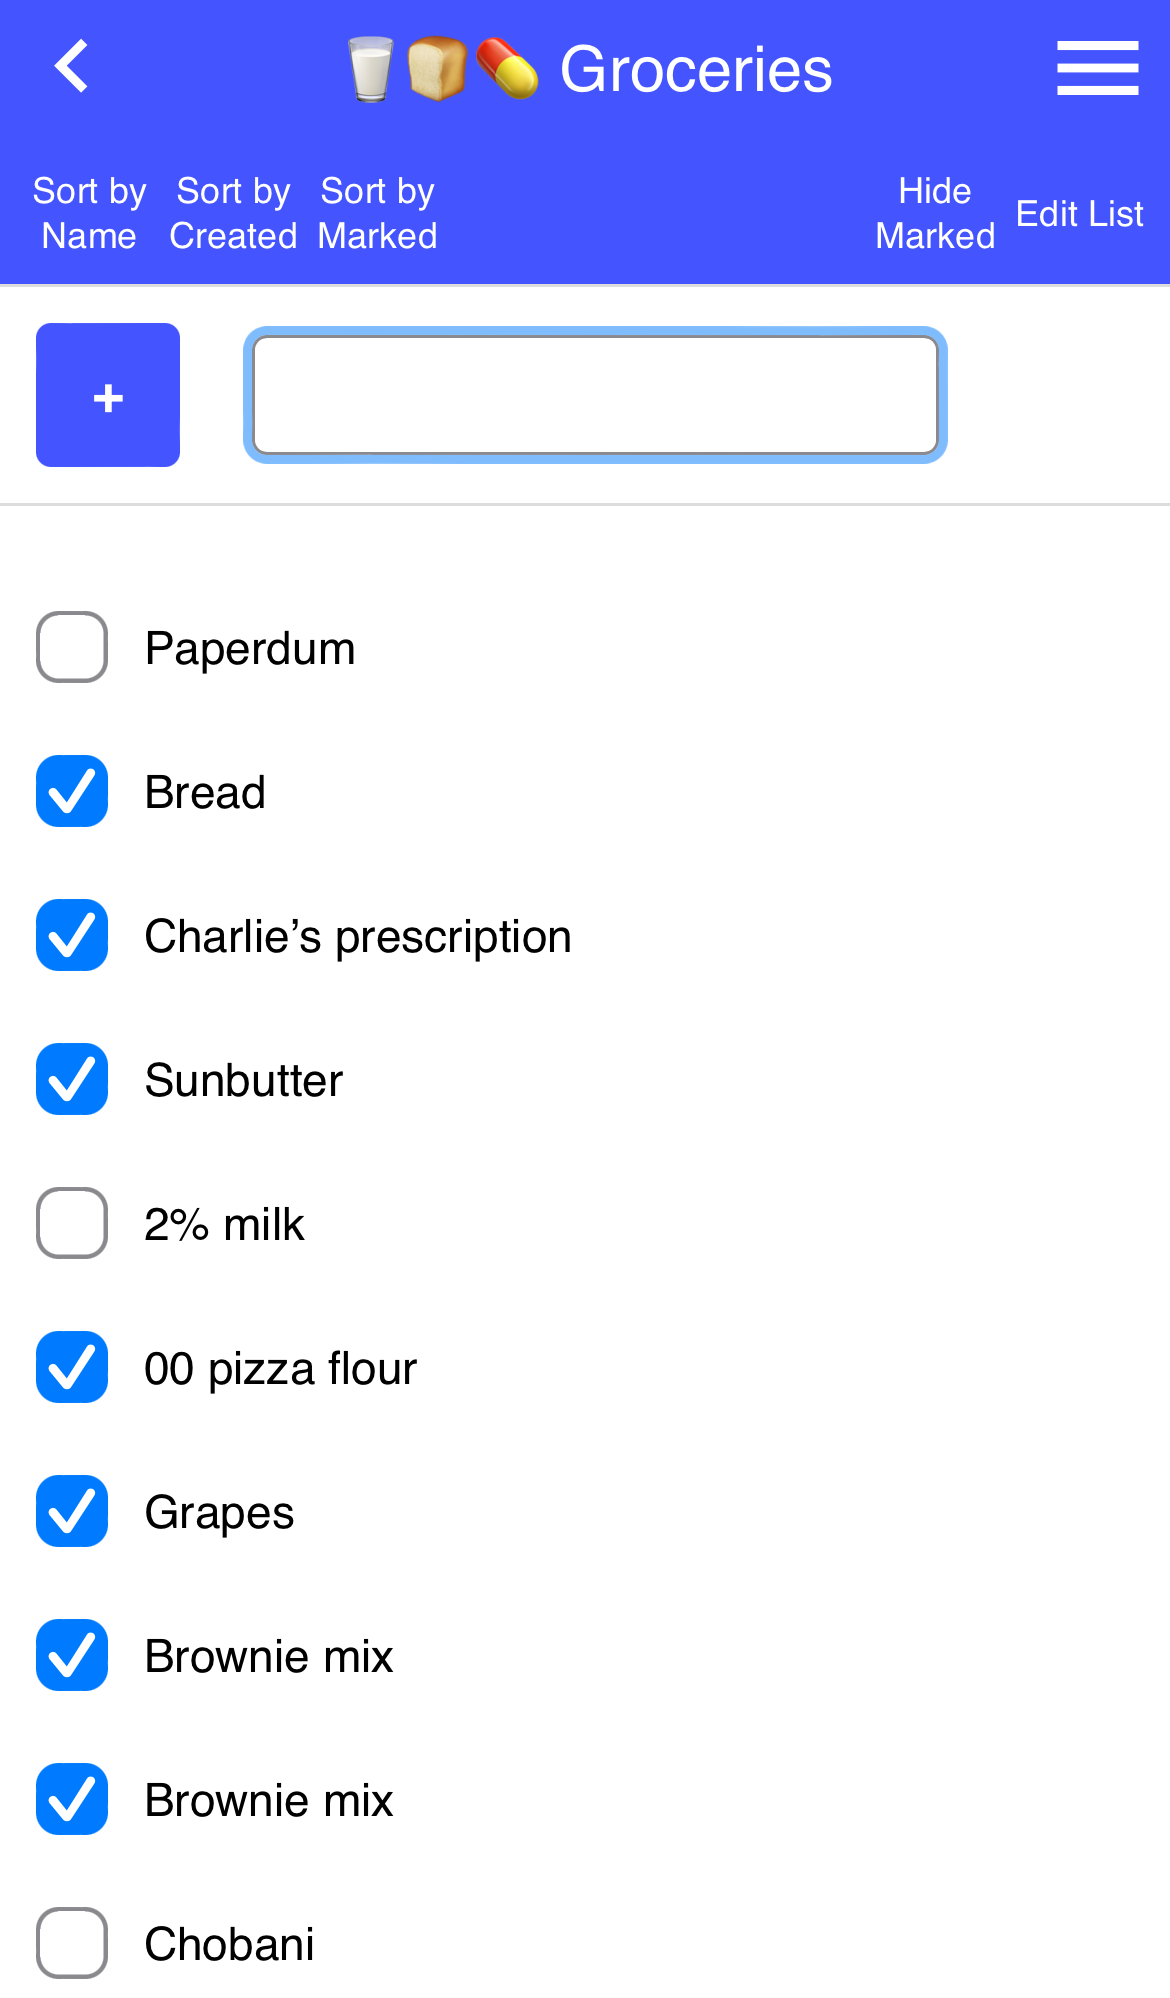
Using a List
Once a list has been created, you can check off items as they are completed by touching the checkbox next to an item. You can also add items to the list by typing in the text box at the top of the list and clicking the plus (+) button.
Action Bar
| Name | Description |
|---|---|
| Sort by Name | Sorts items alphabetically |
| Sort by Created | Sorts items by when they were added to the list |
| Sort by Marked | Sort by Created, but places all unmarked items above all marked items |
| Show/Hide Marked | Toggles if marked items can be seen or not |
| Edit List | Edit the list and control sharing and permissions |
Editing & Sharing
If you are the owner of a list (meaning you are the one who initially created it), or if you have been given sufficient permission by the list owner, you are able to edit the list.
You can rename the list. You can also quickly delete items from the list by clicking the red X next to a list item.
If you click the Share List button on the right side of the Action Bar, you will see a list of Cerrax Cloud users. Check the appropriate boxes to grant permissions to other users to view and edit the list.
| NOTE: | Only the list owner can change sharing settings. Even users with full edit permissions (see below) cannot change sharing settings. |
| Permission | Description |
|---|---|
| View List | User will see the list in their Lister main menu. They can sort and filter the list. |
| Edit Items | User can add items to the list, and check off items. |
| Edit List | User can rename the list, delete items from the list. (You cannot delete a list, only the list owner can do that) |
| NOTE: | Revoking View Items permission will also disable Edit Items and Edit List permissions, even if they are still checked. |
Docket
When a simple checklist isn't enough, Docket gives you a way to track long-running tasks or goals. Docket items include a status to indicate what stage the task is currently in, as well as dates to keep you on schedule and a full history of all updates or changes that have occurred which are related to the task.
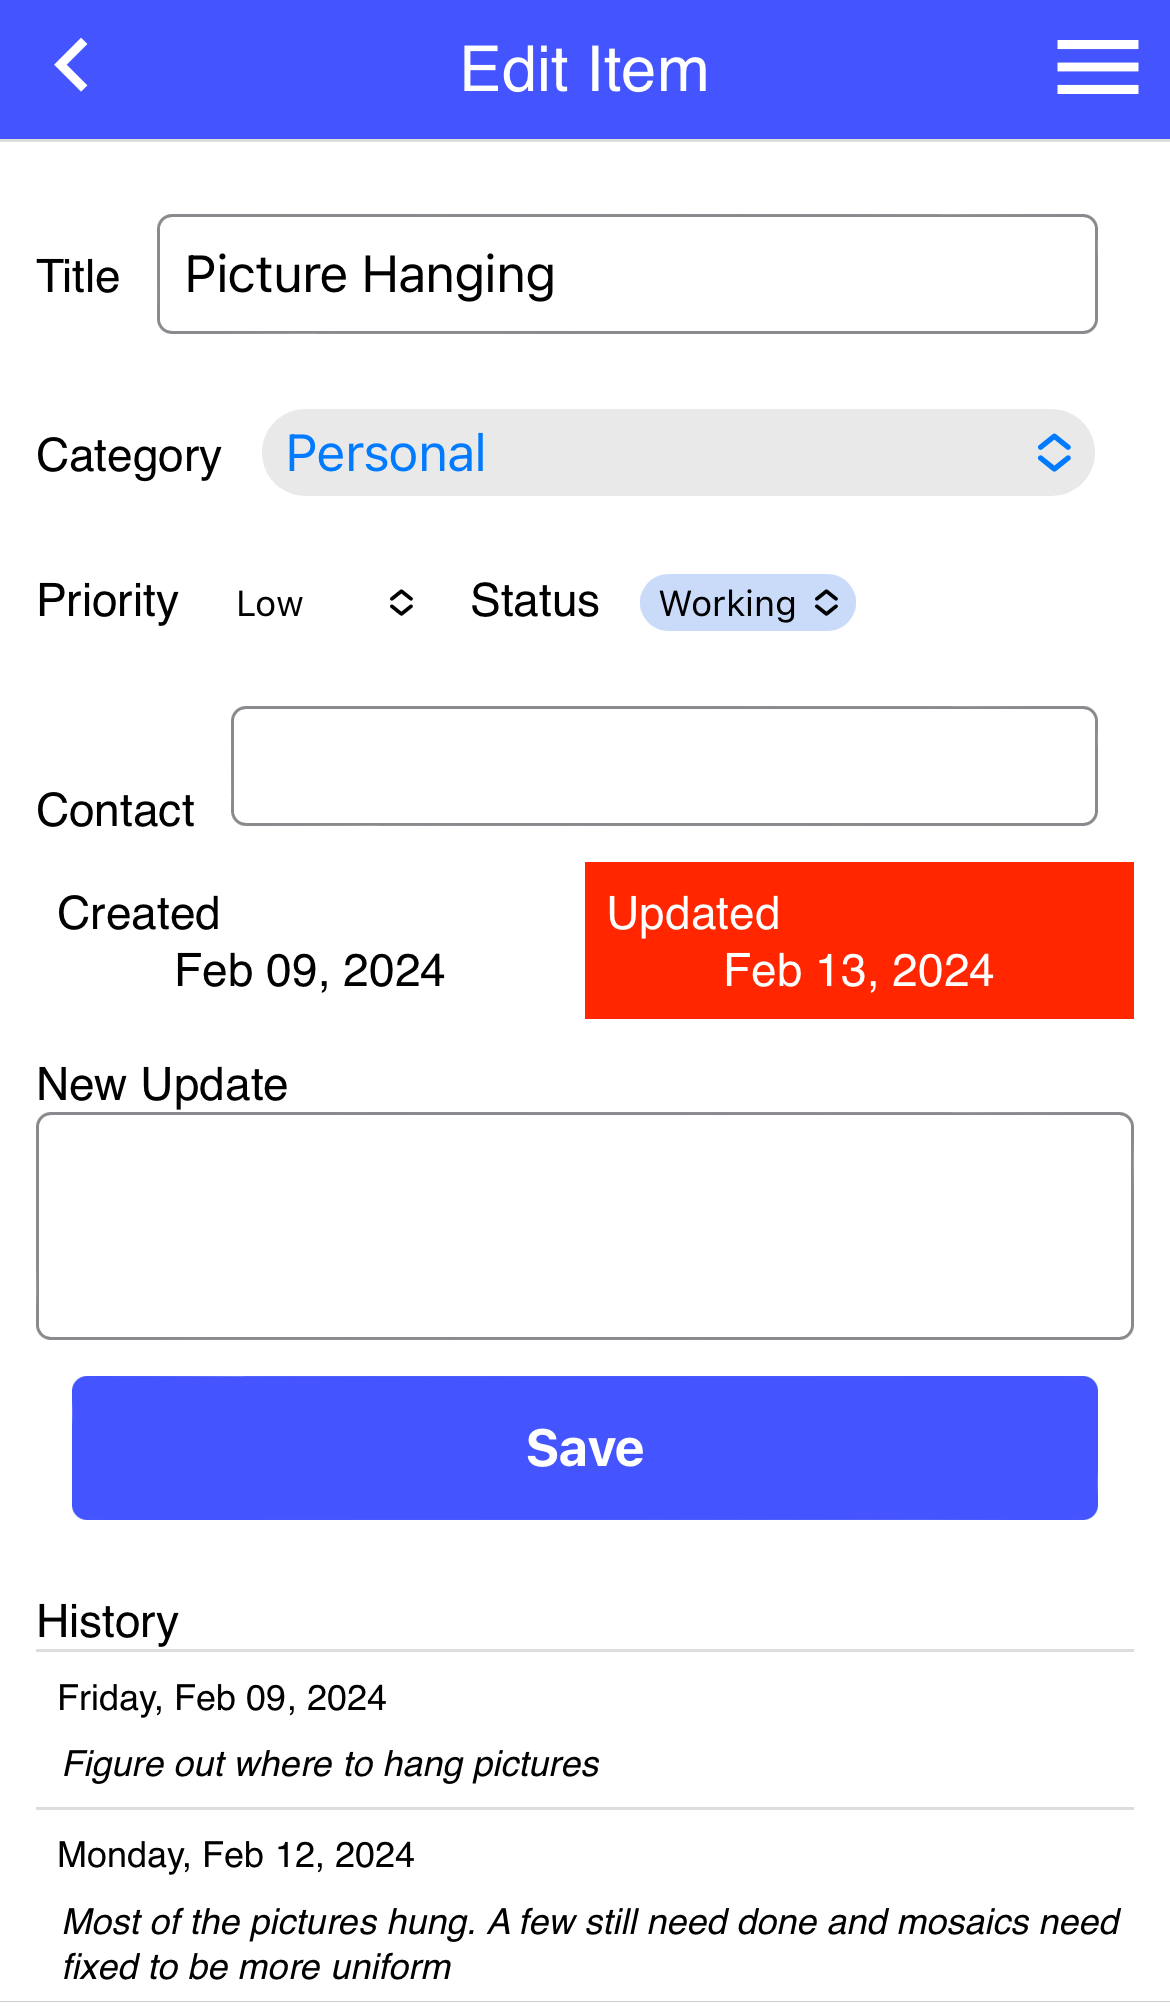
Create a Docket Item
Click the "+ New Item" button on the right side of the Action Bar to start a new Docket item. A Docket item has several different fields to track the status and history of a task.
| Name | Description |
|---|---|
| Title | A name to identify the Docket item. |
| Category | A category this item belongs to. Categories are defined in the Docket Settings (see below). |
| Priority | A priority (Low, Medium, or High) for the item. |
| Status | A status (Open, In Progress, On Hold, Closed) indicating the current state of the task. |
| Contact | Any contact information, such as an email, phone number, or name of a person related to this task. |
| Created | The date the task was created in Docket. |
| Updated | The date that the most recent update or status change was logged. |
| New Update | Add a new update to this task. |
A Docket item requires a Title and at least 1 Update to be created. Docket will keep a timestamped history of all updates posted for the task. Any time something has occurred related to the task, you can use the "New Update" section to log those changes.
Managing Docket Items
On the main Docket screen, you will see a list of all your Docket items. Docket items can be sorted and filtered in a variety of ways.
Sorting Options (ascending or descending)
- Title
- Category
- Priority
- Status
- Created Date
- Updated Date
Filter Options
- Status
- Priority
- Category
Along with sorting and filtering, Docket uses colors to help you quickly identify items. The Priority and Status fields have a color associated to each value (such as yellow for Medium priority, or green for an Open task). The Updated date is also colored based on how long it has been since the most recent update. All of the colors can be changed in the Docket Settings page (see below).
Clicking on a Docket item goes to the Edit screen, where you can change any of the information about the task, add an update, or view the previous updates on the task.
Categories and Settings
On the main Docket screen, clicking on the "Settings" button on the right side of the Action Bar brings you to the Settings page. You can adjust all of the colors used by Docket for the various fields (Priority, Status, Updated).
You can also control how long items stay in Docket. The "Purge items after" setting determines how many days after the most recent update an item will be permanently deleted. The default value is 240 days, but can be changed to any value you would like.
One of the ways that Docket organizes items is by Category. You can define these categories at the bottom of the Settings page. To add a category, type a name for the category in the text box and click the plus (+) button. To edit the name of an existing category, change the text in the box and click "Save". To delete a category, click the red X next to the category name.
| NOTE: | You cannot delete a category if there are still Docket items using that category. Make sure all items of that category are deleted or changed to a different category before attempting to delete that category. |
Generated 11:24AM 14 Aug 2024Documentation generated by Ketchup v2.2.1Developed by Charles Koch - 2020